Assembling a double girder overhead crane is a complex, detail-oriented process requiring careful planning, precise alignment, and knowledge of the crane’s various components. Double girder overhead cranes are typically used in heavy-duty environments such as warehouses, steel mills, and manufacturing facilities where heavy loads must be lifted, transported, and positioned accurately. A well-executed assembly process is critical to ensuring the crane’s stability, safety, and performance. Here, we will explore the key steps involved in assembling the components for double girder overhead cranes, covering essential tools, preparatory steps, and best practices.
1. Understanding the Components of a Double Girder Overhead Crane
Before diving into assembly, it’s important to become familiar with the core components of a double beam overhead crane. These typically include:
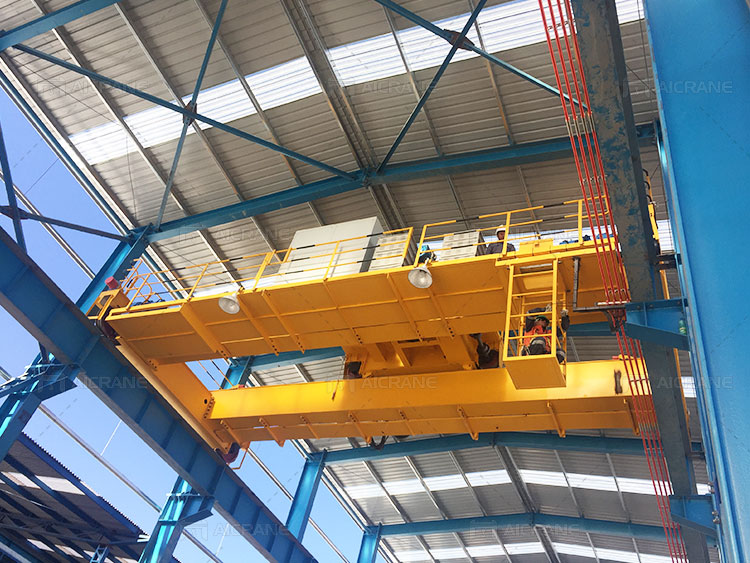
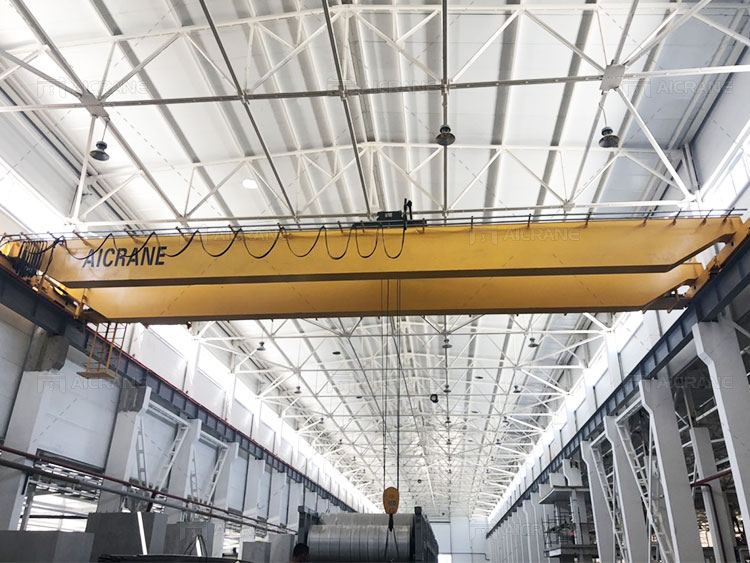
- Bridge Girders: The two parallel beams that span the width of the crane’s operating area.
- End Trucks: The wheeled components that run along the runway rails and support the bridge girders.
- Hoist and Trolley: Mounted on the bridge girders, the hoist and trolley assembly is responsible for lifting and moving loads.
- Runway Beams and Rails: Installed parallel to each other, these provide the path along which the crane moves.
- Control System: Includes a pendant control, remote control, or cabin, allowing the operator to control the crane’s functions.
- Power and Electrical Systems: Supplies the necessary power for lifting and movement.
Each of these components must be properly installed and aligned for the crane to function safely and efficiently.
2. Preparatory Steps
Preparation is essential for the smooth assembly of an Aicrane double girder overhead crane. Here are the preparatory steps that can make a significant difference:
- Site Inspection: Conduct a thorough inspection of the assembly area. Ensure that it is clean, well-lit, and free from obstructions. The site should also be level to prevent alignment issues.
- Foundation and Runway Checks: Verify that the runway beams and support structures are secure and correctly aligned. Runway beams should be level and parallel, as even slight discrepancies can impact crane performance and safety.
- Tools and Equipment: Prepare essential tools, including wrenches, hydraulic jacks, torque tools, measuring tapes, and leveling instruments. Ensure that you have lifting equipment, such as forklifts or mobile cranes, to assist in handling heavy components.
- Safety Gear: Equip all team members with appropriate safety gear, including hard hats, gloves, safety harnesses, and goggles, to protect them throughout the assembly process.
3. Step-by-Step Assembly Process
The assembly process for a double girder overhead crane involves several stages, each of which should be followed meticulously for a successful installation.
Step 1: Installing Runway Beams and Rails
Begin by installing the runway beams and rails. This stage is crucial, as the accuracy of the runway installation directly affects the crane’s alignment and movement.
- Leveling and Alignment: Use laser leveling tools to ensure that the runway beams are perfectly level and parallel. Small alignment errors at this stage can lead to uneven wear on the bridge crane wheels and increased maintenance costs.
- Fastening the Rails: Securely fasten the rails to the runway beams using high-strength bolts or welds, depending on the design. Test the runway for smooth operation by running a small load across it.
Step 2: Assembling the Bridge Girders
Next, move to the assembly of the bridge girders. Since these are the main load-bearing structures, it’s essential to ensure that they are securely connected to the end trucks.
- Positioning the Girders: Place the bridge girders in position, either directly on the runway or on assembly supports if pre-assembly is required. Bridge girders are heavy and may require the use of mobile cranes or forklifts for safe handling.
- Securing to End Trucks: Attach the bridge girders to the end trucks using bolts or welds. This connection must be strong enough to support the entire crane load. Confirm that the alignment of the girder is precise, as misalignment can lead to lateral forces during operation.
- Testing for Stability: Once the bridge girders are secured, test the assembly’s stability by applying a small load. Ensure there is no movement or play in the connections.
Step 3: Hoist and Trolley Installation
The hoist and trolley assembly is the heart of the lifting mechanism. Install this component carefully to ensure that it operates smoothly across the bridge girders.
- Hoist Placement: Position the hoist centrally on the bridge girders. This balanced placement is essential to prevent unequal wear on the trolley wheels and the crane structure.
- Securing the Trolley Mechanism: Attach the trolley mechanism to the hoist. Ensure all bolts and pins are tight, and lubricate the wheels and guide rollers as necessary.
- Testing the Trolley Movement: Run the trolley back and forth along the bridge girder to ensure it moves smoothly. Make adjustments if necessary to achieve smooth and consistent operation.
Step 4: Electrical and Power Connection
Once the main structural components are assembled, connect the crane’s electrical system. This includes the power supply, control system, and any safety devices.
- Wiring: Connect the hoist motor, trolley motor, and bridge motors to the main power source. Use appropriately rated cables and follow electrical safety guidelines.
- Control System Installation: Install the control system, whether it’s a pendant control, remote control, or cabin control. Ensure all functions operate correctly and that emergency stop functions are accessible and responsive.
- Testing the Electrical System: Conduct a power-on test to verify that all electrical components are functioning as expected. Check for consistent power flow, and test each motor independently before full overhead eot crane operation.
4. Testing and Calibration
After completing the assembly, rigorous testing and calibration are required to ensure the crane’s stability and safety.
- Load Testing: Perform a load test at 125% of the rated capacity. This will help verify the structural integrity of the crane and ensure it can safely handle its designated load. Document the results for future reference.
- Operational Testing: Test the crane’s movement across the entire length of the runway and check the hoist’s vertical movement. Look for any unusual vibrations, sounds, or resistance during operation.
- Adjustments: Make any final adjustments to align the crane and ensure that all bolts are tight. Perform any necessary calibration on the control system to achieve smooth and precise operation.
5. Safety Considerations During Assembly
Safety should always be a top priority during crane assembly. Keep these safety considerations in mind:
- Clear Communication: Ensure all assembly team members are aware of each step and communicate effectively to avoid accidents.
- Lockout/Tagout Procedures: Follow lockout/tagout protocols when working with electrical components to prevent accidental energization.
- Regular Inspections: Conduct inspections at each stage of assembly, looking for misalignments, loose bolts, or potential issues that may compromise safety.
6. Maintenance After Assembly
After the crane is assembled and tested, ongoing maintenance is crucial to keep it in optimal working condition.
- Routine Inspections: Inspect the crane’s components regularly for signs of wear, misalignment, and loose connections.
- Lubrication: Apply lubricant to the moving parts such as wheels, bearings, and gears to minimize wear and tear.
- Electrical Checks: Periodically check the wiring and control system for any signs of degradation.
Conclusion
The assembly of a double girder overhead crane is a precise and meticulous process that requires careful planning and skilled execution. From preparing the assembly area to final testing and calibration, each step is vital for the crane’s performance and safety. Following these guidelines ensures that your double girder overhead crane is assembled to deliver reliable and efficient performance, making it a valuable asset in any heavy-duty lifting environment. With regular maintenance and adherence to safety protocols, your crane can serve its purpose effectively and safely for years to come.